What are the top 10 Contractor mistakes common in the Home Energy industry?
Everyone knows the HVAC industry’s reputation. HVAC service people have been known to suggest a replacement for a part that is working fine. They’ve even been known to tell a homeowner they need a new part that doesn’t even exist! They are just making something up that they can “special order” and install just to make a quick buck. Granted, there are plenty of honest and hard working contractors out there. But it always leaves the homeowner skeptical, and rightly so. It is very frustrating for homeowners and honest and educated home performance contractors to see this continually being done when they are trying their hardest to give the industry a better name.
I put together a top 10 list of the less obvious, but huge nevertheless, mistakes made by contractors that we see on a weekly basis while performing energy audits on homes. These are things that are often out of sight. So we can only conclude that either a the contractor didn’t know better, or they are taking advantage of the fact that their work in the attic or crawlspace will probably never be seen by the homeowner.
#1: Installing over-sized Furnaces and Air Conditioners
This is, beyond a shadow of a doubt, the most common and least understood problem with HVAC. Nine out of ten HVAC contractors do NOT understand how to find out the exact size AC or Furnace that a home needs. The remaining one out of ten seem to understand but install over-sized units anyways to make a quick buck.
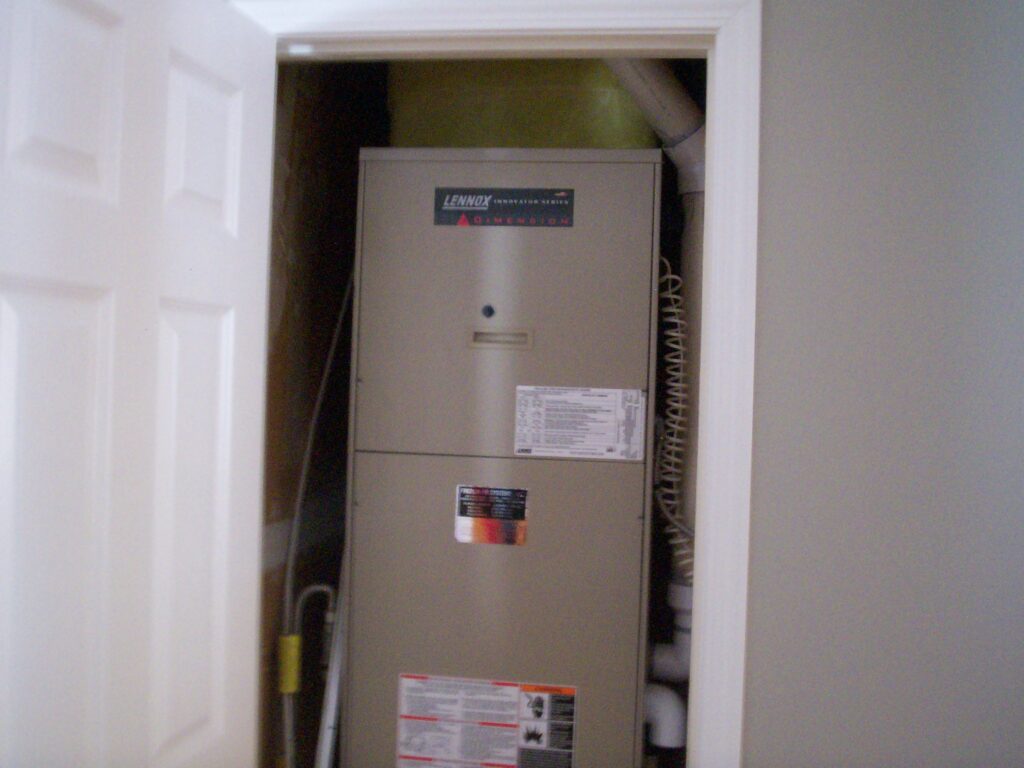
So what is the problem with installing over-sized ACs/Furnaces? It leads to discomfort, high energy bills, potentially hazardous situations and lowers the lifespan of the system. I’m not talking about the actual dimensions of a furnace or AC. I’m talking about the amount of energy output and total airflow being blown through the system. A system with too much energy output and airflow will short cycle. This means the unit will go on, and then off, and then on and then off etc. This is because the thermostat reaches it’s target temperature relatively quickly and then shuts off. It does not give the furnace a chance to warm up to it’s optimum nameplate efficiency (takes 12-15 minutes on average). Until it’s warmed up, the unit will not be even close to the efficiency it claims to be. This is kind of like getting poor mileage on your car while you accelerating. A correctly sized Furnace/AC (assuming the duct system is designed adequately) will run almost constantly, quietly and very very efficiently.
So how do you find out what size Air Conditioner and Furnace to install for any given home? There is only one way to correctly do this. Testing, measurements and a software energy model. These are often called Energy Audits or Energy Assessments. It’s an in depth testing of the whole home. An energy audit will take a look at each individual room. The windows will be measured, the exterior walls, the flooring, the orientation of the windows, the insulation everywhere (attic, floor, walls) measured, the volume of the room, the leakage of the room. All this will tell you the Cooling Loads and Heating Loads. Basically, how much energy each room needs to stay comfortable all year long. At this point it is simple, just add up the Cooling/Heating loads of every room and you get the exact Furnace and AC size that the home needs. Contractors always have their own rules of thumb for vaguely estimating the size of the HVAC appliances. More often than not, these are based on square footage….and that’s it. Obviously this is inaccurate and irresponsible.
Compare a 1500 square foot home that is leaky and un-insulated, to a well built well insulated sealed 1500 square foot home. These have very different heating and cooling needs.
# 2: Leaky Duct Systems
This common issue fights for #1 on the list. The California state average duct leakage is 30%. This includes newly installed duct systems. This means, on average, 30% of the air a homeowner is paying to heat/cool is being lost. That is awful.
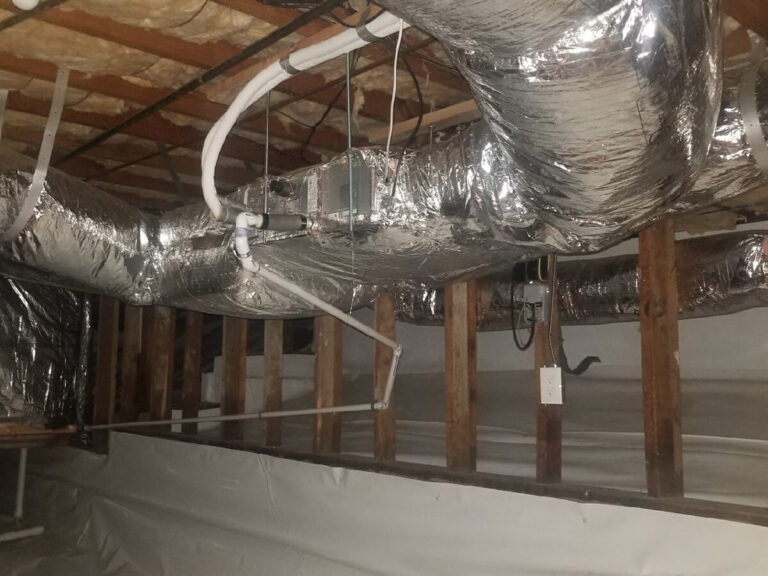
Duct leakage is something that can be completely avoided by carefully installing a system. Water based duct mastic, a white paint on paste, should be used amply at every single connection on the interior of the duct and often on the exterior of the connection as well. However, more often than not Contractors use no sealant or tape. The classic Duct Tape, although great for making home made wallets, is useless on actual duct systems. It loses it’s stick within a year or two and then turns from ineffective to useless. Even the newer tapes (marked UL181 approved) tend to lose their stick over time as the tape often gets dusty or dirty.
[nggallery id=15]
How does duct leakage effect air quality? When a return air duct leaks, it pulls in air from around the duct. This often means crawlspace , attic or garage air. When a supply is leaky it pushes air out of the duct when the system is on. However, when the system is off, any given point of leakage is an open hole to your crawlspace, attic, or garage.
How leaky is my duct system and how is the leakage tested? Duct leakage should always be tested after an install. It very rarely is. When you are paying for a supposedly sealed duct system, wouldn’t you like to know exactly how sealed it is? Even though the ducts are not disconnected, a newly installed duct system easily will leak at every connection and cumulatively at up to 30% leakage. How do you test the duct leakage? Duct Blaster equipment can be used to precisely test how many Cubic Feet per Minute (CFM) of air is leaking out of the whole system.
#3: Incorrect Duct Sizing
Yes, this is very conceptually similar to #1 on this list! In fact, they go hand in hand. To put it simply, the larger the energy output of a Furnace/AC, the more airflow and therefore the larger the ducts need to be. Often some furnaces/ACs are just so over-sized that a duct system simply cannot be realistically designed for it. If a relatively under sized duct system is installed anyways, it’s a guarantee that it will be noisy, costly and uncomfortable.
Earlier I talked about finding the needs of each room in terms of heating/cooling. Using this same measurements/test results, a professional home performance contractor should always calculate how much airflow each room needs for heating and cooling. Based on this room requirement, one can now find out exactly how large of a supply register/vent is needed and the exact ideal size of the duct leading to it. True comfort is delivering the precise amount of air to each room and designing it in such a way that it delivers a constant slow, even temperature.
So what do HVAC contractors often do wrong here? They put in generic duct sizes and register/vent sizes without any regard to the size of the furnace and needs of each room. It’s very simple in their minds…bathroom needs 4″ duct, bedroom needs 6″ and living rooms need 8″. This saves them a great deal of time and $ by not doing the testing, not designing a system, not having to order very specific materials and not carefully installing it all.
#4: Fiberglass Batt Insulation in an Attic
Fiberglass batts are great, in theory. They are cheap, portable and easy to install. Well…that last one was only partially true. They are only considered easy to install by Insulation Contractors who just plop them in and leave. In order to install them correctly, it is actually quite difficult and time consuming. How can you tell if your fiberglass batts were installed well in your attic? That’s part of the problem, it’s difficult to tell by looking at them from the top. You need to lift up some of the batts to see if they are actually maintaining full contact with the floor of the attic (ceiling of your home). If not, they are not effectively insulating. The other much more effective way of testing how well the insulation was installed is by using an IR (infrared) camera. However, these are very expensive.
I do a lot of Energy Audits. And nearly every time, the fiberglass batts are installed poorly in the attic. They are: a) missing, b) torn up, c) compressed, d) not cut to fit around cords/pipes, e) deteriorated, f) not touching the surface they are supposed to insulate. In the cases where it has been torn up, this is not often the Insulation Contractor’s fault but most likely the fault of another Contractor doing some work in the attic. However, the fact remains that it is torn up and not doing it’s job.
[nggallery id=6]
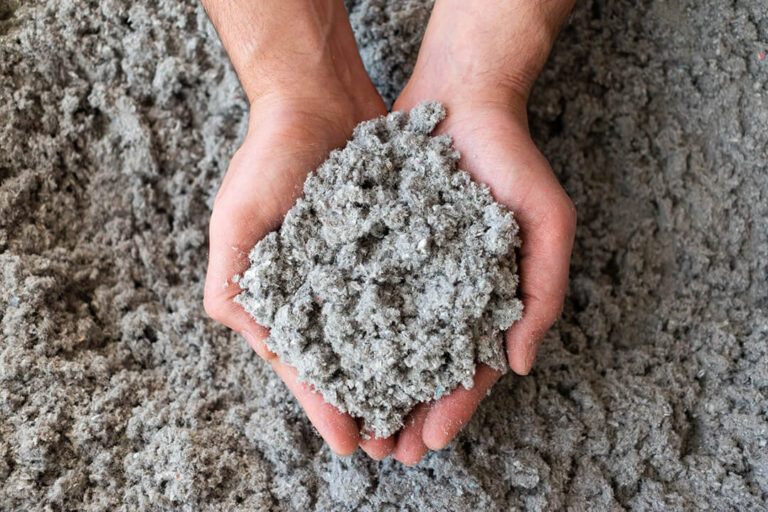
This is why Blown-in insulation is more effective. It does not need to be cut-to-fit. It can easily be piled to R38 levels (current standard). It will insulate evenly. It will maintain contact with the attic floor. Blown-in insulation is not perfect though. Damns need to be made if an attic has raised or lowered spots. Baffles need to be installed at every eave vent so the insulation doesn’t get blown around. Some blown-in insulation does settle and deteriorate over time. Fiberglass blown-in is still bad for air quality.
Cellulose blown-in is much better on air quality. And “Stabilized” cellulose blown-in comes with our highest recommendation. It is blown-in alongside a fine mist of water that activates the resin in the cellulose insulation. This causes it to maintain it’s form over time and not settle nearly as fast.
#5: Not Installing Baffles for an Attic Insulation Job
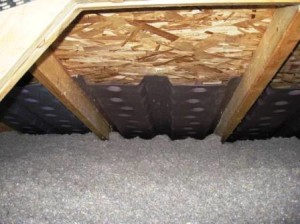
What is a Baffle? In this context, it is a material that is supposed to be installed at every single eave vent in the attic. It redirects the cross ventilation airflow, from the eave vents, over the insulation. They are quite difficult to install and even trickier to install well. Why? Imagine being claustrophobic-ally stuck between the slope of the roof and the floor of the attic. Insulation is smothering you and you can barely see. You are sweating heavily and trying to keep track of all your tools and the baffle material. You are trying to distribute your weight safely. And you are trying to not get poked in the noggin by roofing nails. While dealing with all that, install the baffle. Now, do it 30 more times on all the other baffles. So! you can see why it often gets neglected.
What happens if no baffles are installed? If it is blown-in insulation then the insulation will get blown away from the eaves over time and mound up in the middle. This will ruin your thermal barrier. If it is fiberglass batts, then Insulation Contractors often just stuff the batt in towards the eave as far as it can go. This blocks the airflow and reduces the attic’s ability to ventilate.
#6: Insulating Without First Air Sealing
First off, what is Air Sealing? It is a home performance industry basic energy measure to tighten up the home. All home’s leak a great deal. In fact, a little bit of leakage is necessary for getting fresh air. The average is much much higher than what is necessary. Also, if an attic or crawlspace leaks to the home, that is dusty, moist dirty unconditioned air. These two areas (Attic/Crawl) need to be sealed up tightly before insulation is considered.
Why air seal before insulating? First reason is that it is much more difficult to go in an insulated attic to air seal than an un-insulated attic. Second reason is that if you have air leakage passing through the insulation, the insulation can no longer do it’s job.
[nggallery id=16]
How is air leakage (the overall leakage of the whole home) tested? It is tested using home performance energy audit equipment called a Blower Door. This should be used before air sealing and after as well. There is no other way to quantitatively measure the progress.
If your attic is partially insulated (old insulation presumably) and was never air sealed (very often the case) then it may be worth it to fully remove the existing attic insulation prior to air sealing and re-insulating.
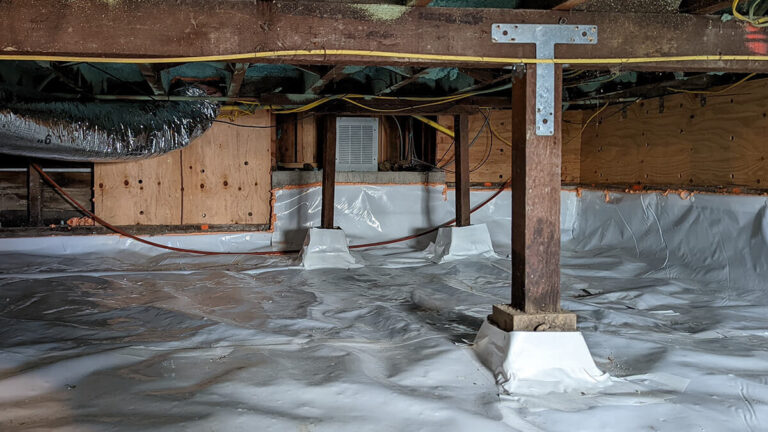
It is a little different in crawlspaces, often air sealing can be done around existing floor insulation. This is also an opportunity to fix the existing floor insulation and make sure it is making contact with the floor of your home and is supported frequently.
#7: Poor Knee Wall Insulation Installation
What is a Knee Wall? It is a vertical wall in an attic that is shared with inside space. For example, a skylight has 4 knee walls in the attic. These all need to be insulated and air sealed. Another example is in a home with cathedral ceilings next to a regular attic space. This often creates a vertical wall that is shared between the attic space and the inside of the home.
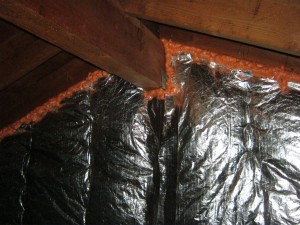
Since gravity is not working in your favor, blown-in insulation cannot be used here. Fiberglass batts are currently the most cost effective option. However, just as it was described above, fiberglass batts are often installed very poorly. There is one added factor here though. Knee walls are notoriously leaky. What should be done is to carefully install an R13 fiberglass batt. Next, install an R6 rated FSK air barrier over the batt. Then seal this all securely to the framing so that it will never loosen or fall.
#8: Designing a Home – Creating Inaccessible Spaces
This is a case of the right hand not talking to the left. Architects, often do not consult with HVAC and Home Energy Contractors. This becomes very apparent when you see 2 story homes where the ducts, with huge effort, have been creatively run within the framing of the 2nd story floor. We tip our hat to the HVAC contractors for doing their best all things considering. In that case, there was no room left in the floor plan for a wall chase. That is, a means of getting the ducts from the furnace downstairs to the upstairs and into the attic. Once in the attic, they can split off and go to each room. This maximizes accessibility for future work situations and should be an obvious thing to do.
It is too often that we see a great deal of duct work within the framing of the house. It is inaccessible, leaky, restricting the airflow and cannot be improved short of taking off drywall and possibly re framing.
Here’s another one. Eichler style homes, cathedrals and flat roofs. Yes, they can be very pretty. But how energy efficient can a home be if there is no accessibility to an attic or crawl, no space to add insulation, and has very large windows? The answer is that they cannot be efficient at all. For some people the aesthetic outweighs the lack of practicality and comfort.
#9: Recommending Window Upgrades over more cost effective energy measures
Windows are simple, visual and easy to understand. So, there is an ongoing trend that every homeowner seems to want to immediately switch out their single pane windows for double pane. The average homeowner does not know about the more cost effective issues to solve in a home: air leakage, duct leakage, insulation standards, proper HVAC design. Granted, some of these things can be expensive too sometimes. However, window upgrades will barely save you any energy at all and will cost an arm and a leg.
If the window is single pane, metal framed and very leaky then it becomes more practical to replace it with an energy efficient window. Even then, it barely begins to approach the top of the list of cost effective priority projects in your average home. If you still feel it is time to replace windows, pick the most uncomfortable rooms or the rooms you spend the most time in. Make sure the new window has a U-value and SHGC (solar heat gain coefficient) both around or just below 0.30. Don’t even begin to consider triple pane windows.
So, in summary, this is another case where Contractors often recommend window replacements so they can make some quick and easy money.
#10: Open Return Cavities – Return Air Ducts
This is a big indoor air quality one. Previously we described what happens when a return air duct leaks. Simply put, when there is a leak in a return air duct then the filthy, unconditioned air from around the duct gets pulled into the duct. That air then makes it’s way to the furnace/AC. It gets heated or cooled and then sent into the house for people to breath in.
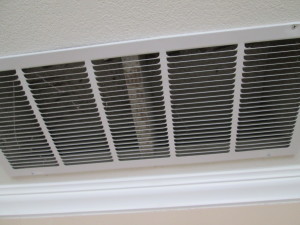
So what is an Open Return Cavity then? It’s the leakiest kind of duct out there. In fact, there is no duct. An open return cavity is when the framing of the home is used as a “duct” to poorly supply the furnace with air from inside the house. The problem here is that the framing of the house is always very leaky. So where is the return air being pulled in from? The crawlspace, attic, garage etc. Dust, pollen, mold, fungus, moisture, rat/mouse waste is all then contributing to the poor air quality of the home.
This is especially common and dangerous in a garage. They install a furnace/AC in the garage on a big box. Sometimes, the leaky box is supposed to act as the duct. It never does so very successfully and ends up pulling in garage air. This is the same air where we store our paint, hazardous house waste, start our car engines and more. I’ve even seen an entire brand new housing development (cookie cutter houses) all done this way. One after another.
How can you check if your home has this problem? Look inside your return air. If you don’t see a duct then this is most likely an issue with your home.
Well, I could go on and on but this article is titled “Top 10” so I’ll keep it to 10. Things are still being done poorly, albeit less so now than the age of asbestos, and the industry is only crawling forward when it should be at a full sprint. Be careful and try to educate yourself as much as possible before investing in a project and especially before buying a home. If you decide to have energy work done on your home, make sure the work is done right the first time around.
Get in contact:
For more information about how things can be done right the first time, call (925) 363-4498 to speak to a technician or schedule an Energy Assessment. You can also email: info@epbuilders.com
Read our Testimonials from happy homeowners!
Photos of the variety of Home Performance Services we provide on a weekly basis:
[nggallery id=27]
